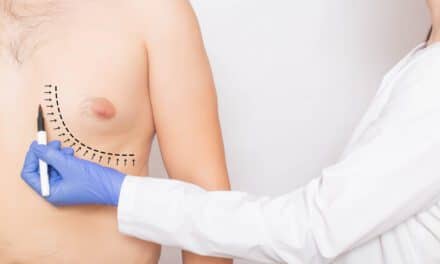
Earrings can be the bane of earlobes—here’s how to correct the damage
 Earlobe piercing is a practice that dates back to ancient times. In the Ivan, Kayan, and Kenyan tribes, for example, earlobes were adorned with very heavy brass earrings, creating an elongation and enlargement of the piercing hole.1 In Latin-American societies, piercing the earlobes of a newborn girl to indicate her sexual identity has been routinely practiced.2
As a result of the current cultural and fashion trends, there has been a recent increase in the practice of earlobe piercing for men as well as multiple ear piercings for women. This has led to a greater incidence of patients coming to physicians for aesthetic repair of piercing complications such as torn earlobes.2
Other common local complications that result from earlobe piercings include contact dermatitis, infection of the lobule, keloid formation, and lobular tissue loss from violent trauma.3,4
A Sudden Pull
Torn earlobes are also referred to as “split” or “cleft” earlobes in the literature. They are typically an acquired deformity from a sudden pull on an earring,5 prolonged traction from heavy or pendulous earrings,6 or chronic and repetitive tension on the piercing site from jogging activities and habitual fondling.7
McLaren has described clefts that develop from earlobe necrosis caused by tight clip-on earrings.5 Over time, the earlobe atrophies at the pressure point, becomes thinner, and eventually produces a hole that gradually enlarges until the earlobe splits. The position of the this hole may influence the earlobe’s tendency to tear, particularly if the ear was pierced too low on the lobe.3
Traumatically or gradually acquired torn earlobes can be classified as having complete or partial clefts, or unilateral or bilateral clefts.
Complete cleft. Most complete clefts are unilateral, and result from acute trauma in which the earring is suddenly pulled out.2 The lobule becomes divided into a medial and a lateral limb.
Incomplete or partial cleft. This deformity tends to be associated with the prolonged use of heavy, pendulous earrings, and is typically bilateral.
Blanco-Davila and Vasconez have devised a subclassification system for clefts2:
Type I: The boundaries of the cleft hole extend less than half the distance between the original piercing and the inferior margin of the earlobe.
Type II: The boundaries of the cleft hole extend more than half the distance between the original piercing and the inferior margin of the earlobe.
Type III: The cleft hole completely splits the earlobe.
The Techniques
 Numerous techniques for repairing torn earlobes have been described in the literature. These methods range from the simple excision of the epithelial tract with primary closure to the elaborate incorporation of a Z-plasty design at the inferior lobular margin, along with flap maneuvers to re-establish the earring site.
Straight-line closure. McLaren de-scribes the simple technique of paring the border of the cleft and suturing the margins together.5 Tan advocates using the straight-line closure, but only for partial clefts.8 He introduced an interesting technique that involves using an appropriately sized punch biopsy tool to fit around the cleft defect so that fresh wound edges are created. He explains that the earlobe skin must be made taut by embracing it in the ring-like tongs of a chalazion forceps prior to the application of the punch. This maneuver achieves a precise full-thickness excision of the defect. Simple reapproximation of the skin edges is performed.
Apesos and Kane propose an inverted V-shaped excision of the entire cleft.3 They do not intend to preserve the hole, but they do advocate undermining the anterior and posterior skin edges to 1 mm before the wound is sutured in a simple fashion.
Straight-line closure with hole preservation. Boo-Chai describes incomplete excision of partial or full clefts to preserve the epithelium at the apex of the cleft and to re-establish the original piercing hole.9 He converted partial clefts to full clefts by excising the inferior skin bridge between the cleft limbs. The cleft edges below the preserved epithelium were freshened and closed in a straight line after a thin matchstick was placed at the apex as a temporary spacer.
Straight-line closure with modification of the inferior rim. Straight-line repair is simple and fast, but the eventual healing result may be aesthetically unacceptable. As the scar contracts over time, many straight-line repairs develop grooves along the suture lines, notches at the inferior free earlobe margin, or both, making it obvious that a surgical repair had been performed.10 For this reason, many authors have recommended using some method to break up the straight-line closure with a Z-plasty, either on the anterior surface of the earlobe or, more commonly, at the inferior lobular rim.
Casson describes his technique of incorporating a Z-plasty flap into the straight-line closure.11 After the skin at the edges of the split lobe is excised—or freshened, as in the case of an acute traumatic tear—the edges are reapproximated. He discourages the preservation of the epithelial track of the original piercing during the repair. However, the lobe margin is closed with a Z-plasty designed to prevent the effect of incisional notching or scalloping of the inferior contour (Figure 1). If repiercing is desired, Casson advocates using a new site, once the healing from the repair is complete.
Kalimuthu et al propose a V-flap technique.12 After the cleft lining is excised, a 3-mm V-shaped flap is designed at the inferior border to fit into a 3-mm-long slit made at the lobe margin on the opposite side. The V-flap is inserted into the straight split incision and sutured into place. No preservation of the original piercing site is made with his approach (Figure 2).
Hole preservation with modification of the inferior rim. Fatah was the first to describe the L-plasty design for the repair of torn earlobes.10 The area of cleft skin excision is marked out on the lobe. The design leaves an L-shaped flap on one side of the cleft and a reverse L-shaped defect on the contralateral edge. Full-thickness incisions for the L-plasty are made along the markings, and the L-flap is inset accurately, with care taken to align the inferior free border. Because the design breaks up the vertical orientation of the incision, the direction of scar contracture is interrupted, thereby reducing the inferior notching.
Fatah’s L-plasty technique has since been adapted to perform cleft repairs without preserving the earring hole.12 In this situation, the initial markings of the L-shaped flaps encompass the cleft apex to excise the entire cleft lining (Figure 3, page 44). The L-plasty is also a useful method for performing minor reductions in the sizes of earlobes by incorporating small triangular back cuts into the crotch of the design.12,13
The Surgeon’s Choice
The surgeon must choose the technique that he or she is most comfortable performing and the methodology that is most appropriate for a particular patient. In general, I recommend that all partial clefts be converted to complete clefts prior to definitive repair. This ensures a successful aesthetic closure and optimizes the results. The earring hole, therefore, should be re-established after the cleft repair has healed. A conservative waiting period of 6 weeks to 3 months before repiercing is recommended in the literature.7,8
 When you complete a torn earlobe repair, it is advisable to incorporate a broken-line closure, Z-plasty, V-plasty, L-plasty, or a similar flap into the inferior margin of the lobe. This additional maneuver is necessary to reduce the risk of postoperative scar contracture that is often associated with a straight-line closure. Preventing inferior lobular rim notching and scalloping should be an aesthetic priority during earlobe repair.
The recommendations and technical steps given below should provide guidance and facilitate planning for treating most torn earlobes.
1) Mark out where the incisions are to be made.
2) Infiltrate the lobe with a 1% lidocaine solution containing 1 part epinephrine per 100,000 parts lidocaine until the lobe becomes firmer and pale. This will facilitate making the incisions.
3) Make the sharp and acute-angle corners of the excision design with the number 11 blade. The number 15 or 15-C blade can also be used for the incisions.
4) Gently undermine the anterior and posterior skin edges by 1 mm with a small scalpel. This will make edge eversion easier.
5) Retract the earlobe edges or skin flaps with small single- or double-prong skin hooks. Fine Bishop–Harmon forceps with teeth can also be used. It is important to remember that optimal healing occurs when the amount of trauma from soft-tissue handling is kept to a minimum.
6) For hemostasis, use a needle-tip cautery placed on a low setting, or a handheld, battery-powered cautery unit. Take care to avoid excessive cauterization, particularly near the skin edges. It is far preferable to begin wound closure with a damp tissue bed than with a charred, contracted dry tissue surface.
7) Close soft lobes 4 mm thick or thicker with a minimal number of subcutaneous interrupted sutures. The sutures will facilitate cutaneous edge approximation, increase the tensile strength of the wound, and reduce dead space. A 4-0 or 5-0 absorbable suture is appropriate. In thin earlobes, less than 4 mm thick, a two-layered closure is not necessary.
8) Evert the skin edges during closure. Vertical interrupted sutures may be necessary in some cases. I recommend using 5-0 or 6-0 nonabsorbable sutures, and they should be removed by day 5–7 postsurgery.
9) Apply antibiotic ointment over the sutured incision daily or twice daily to facilitate healing.
 10) Remove the sutures carefully to minimize distortion and dehiscence of the wound edges. Fine forceps and a number 11 blade can be used.
11) After suture removal, use 1¼4-inch wound-closure strips. Apply them across the incision to take tension off the healing wound.
12) If the patient desires repiercing, do not do it through the scar. Tell the patient that placing the new hole adjacent to the cleft repair is likely to minimize the risk of cleft recurrence.
13) You can do the repiercing safely. Place the new piercing site in a nonscarred area of the lobule, midway between the superior edge of the antitragus and the inferior rim of the earlobe. The box on this page provides the details of the recommended procedure.
14) Tell the patient that it is prudent to avoid heavy and pendulous earrings.
15) Advise the patient who has had multiple infections at the piercing site not to have the earlobe repierced.
The repair of the torn earlobe is not a difficult procedure, but it does require technical precision and appropriate planning of incisions and flap designs. Carelessness with the surgical repair and ignorance of the repair principles is likely to lead to aesthetically dissatisfying results. The patient’s eagerness to wear earrings immediately and at the original piercing location should not influence the physician’s plan of repair. PSP
Deborah Watson, MD, FACS, is the director of facial plastic and reconstructive surgery in the Division of Head and Neck Surgery at the University of California, San Diego. She has expertise in nasal reconstruction, rhinoplasty, and a variety of other aesthetic facial procedures. Her basic science research interests include tissue engineering of human nasal septal cartilage. She can be reached at (858) 642-3405 or [email protected].
References
1. Abrahams PH. Earlobe Z-plasty in Borneo. Plast Reconstr Surg. 1975;53: 548–550.
2. Blanco-Davila F, Vasconez HC. The cleft earlobe: A review of methods of treatment. Ann Plast Surg. 1994;33:677–680.
3. Apesos J, Kane M. Treatment of traumatic earlobe clefts. Aesthetic Plast Surg. 1993;17:253–255.
4. Hendricks WM. Complications of ear piercing: Treatment and prevention. Cutis. 1991;48: 386–94.
5. McLaren LR. Cleft earlobe: A hazard of wearing earrings. Br J Plast Surg. 1954;7:162–165.
6. Pardue AM. Repair of the torn earlobe with preservation of the perforation for an earring. Plast Reconstr Surg. 1973;51: 472–473.
7. Smith C, Glaser DA. Surgical pearl: Repair of split or deformed earlobe with a tongue depressor blade for stabilization during surgery. J Am Acad Dermatol. 1998;38:990–991.
8. Tan EC. Punch technique: An alternative approach to the repair of pierced earlobe deformities. J Dermatol Surg Oncol. 1989;15: 270–272.
9. Boo-Chai K. The cleft earlobe. Plast Reconstr Surg. 1961;28: 681–688.
10. Fatah MF. L-plasty technique in the repair of split earlobe. Br J Plast Surg. 1985;38:410–414.
11. Casson P. Ask the expert: How do you repair a split earlobe? J Dermatol Surg. 1976;2:21.
12. Kalimuthu R, Larson BJ, Lewis N. Earlobe repair: A new technique. Plast Reconstr Surg. 1984;75:299–300.
13. Constant E. Reduction of the hypertrophic earlobe. Plast Reconstr Surg. 1979;64:264–267.
How to Repierce an Earlobe
1) Wipe the earlobe with isopropyl alcohol or povidone–iodine, dry it, mark the desired piercing site, and ask the patient to approve it.
2) Inject less than 0.5 mL of 1% lidocaine with epinephrine into the lobule.
3) Insert an 18-gauge sterile needle all the way from the posterior surface of the earlobe through to the anterior surface. It is critical that the needle tip exits the anterior surface at the previously marked position.
4) Slip the earring post into the barrel of the 18-gauge needle (fitting the post into the lumen of the needle should be tested beforehand). As the needle is backed out of the lobule, guide the earring post into position. Preferably, the post should be surgical-grade or stainless steel, and should not contain nickel.
5) Do not allow the backing piece to squeeze the earlobe when you slide it into position on the post.
6) If there is any bleeding, apply pressure to the lobule with a gauze sponge for several minutes.
7) Instruct the patient to wipe the anterior and posterior aspects of the earring post and earlobe twice per day with an alcohol pad. Using mild soap and water followed by careful drying can done instead. Twisting and turning the earring post is not recommended because this can increase the risk of irritation or infection.4
8) Tell the patient that the earring posts that are inserted initially should not be changed for at least 6 weeks to allow enough time for complete healing and epithelialization within the hole.